kdb+ Setup
Driverless AI allows you to explore kdb+ data sources from within the Driverless AI application. This section provides instructions for configuring Driverless AI to work with kdb+.
Note: Depending on your Docker install version, use either the docker run --runtime=nvidia (>= Docker 19.03) or nvidia-docker (< Docker 19.03) command when starting the Driverless AI Docker image. Use docker version to check which version of Docker you are using.
Description of Configuration Attributes
kdb_user: (Optional) User namekdb_password: (Optional) User’s passwordkdb_hostname: IP address or host of the KDB serverkdb_port: Port on which the kdb+ server is listeningkdb_app_jvm_args: (Optional) JVM args for kdb+ distributions (for example,-Dlog4j.configuration). Separate each argument with spaces.kdb_app_classpath: (Optional) The kdb+ classpath (or other if the jar file is stored elsewhere).enabled_file_systems: The file systems you want to enable. This must be configured in order for data connectors to function properly.
Example 1: Enable kdb+ with No Authentication
This example enables the kdb+ connector without authentication. The only required flags are the hostname and the port.
nvidia-docker run \
  --pid=host \
  --init \
  --rm \
  --shm-size=256m \
  --add-host name.node:172.16.2.186 \
  -e DRIVERLESS_AI_ENABLED_FILE_SYSTEMS="file,kdb" \
  -e DRIVERLESS_AI_KDB_HOSTNAME="<ip_or_host_of_kdb_server>" \
  -e DRIVERLESS_AI_KDB_PORT="<kdb_server_port>" \
  -p 12345:12345 \
  -v /tmp/dtmp/:/tmp \
  -v /tmp/dlog/:/log \
  -v /tmp/dlicense/:/license \
  -v /tmp/ddata/:/data \
  -u $(id -u):$(id -g) \
  harbor.h2o.ai/h2oai/dai-centos7-x86_64:1.9.0-cuda10.0.23
This example shows how to configure kdb+ options in the config.toml file, and then specify that file when starting Driverless AI in Docker. Note that this example enables kdb+ with no authentication.
Configure the Driverless AI config.toml file. Set the following configuration options.
enabled_file_systems = "file, upload, kdb"
kdb_hostname = <ip_or_host_of_kdb_server>"
kdb_port = "<kdb_server_port>"
Mount the config.toml file into the Docker container.
nvidia-docker run \
  --pid=host \
  --init \
  --rm \
  --shm-size=256m \
  --add-host name.node:172.16.2.186 \
  -e DRIVERLESS_AI_CONFIG_FILE=/path/in/docker/config.toml \
  -p 12345:12345 \
  -v /local/path/to/config.toml:/path/in/docker/config.toml \
  -v /etc/passwd:/etc/passwd:ro \
  -v /etc/group:/etc/group:ro \
  -v /tmp/dtmp/:/tmp \
  -v /tmp/dlog/:/log \
  -v /tmp/dlicense/:/license \
  -v /tmp/ddata/:/data \
  -u $(id -u):$(id -g) \
  harbor.h2o.ai/h2oai/dai-centos7-x86_64:1.9.0-cuda10.0.23
This example enables the kdb+ connector without authentication. The only required flags are the hostname and the port.
Export the Driverless AI config.toml file or add it to ~/.bashrc. For example:
# DEB and RPM
export DRIVERLESS_AI_CONFIG_FILE="/etc/dai/config.toml"

# TAR SH
export DRIVERLESS_AI_CONFIG_FILE="/path/to/your/unpacked/dai/directory/config.toml"
Specify the following configuration options in the config.toml file.
# File System Support
# upload : standard upload feature
# file : local file system/server file system
# hdfs : Hadoop file system, remember to configure the HDFS config folder path and keytab below
# dtap : Blue Data Tap file system, remember to configure the DTap section below
# s3 : Amazon S3, optionally configure secret and access key below
# gcs : Google Cloud Storage, remember to configure gcs_path_to_service_account_json below
# gbq : Google Big Query, remember to configure gcs_path_to_service_account_json below
# minio : Minio Cloud Storage, remember to configure secret and access key below
# snow : Snowflake Data Warehouse, remember to configure Snowflake credentials below (account name, username, password)
# kdb : KDB+ Time Series Database, remember to configure KDB credentials below (hostname and port, optionally: username, password, classpath, and jvm_args)
# azrbs : Azure Blob Storage, remember to configure Azure credentials below (account name, account key)
# jdbc: JDBC Connector, remember to configure JDBC below. (jdbc_app_configs)
# hive: Hive Connector, remember to configure Hive below. (hive_app_configs)
# recipe_url: load custom recipe from URL
# recipe_file: load custom recipe from local file system
enabled_file_systems = "file, kdb"

# KDB Connector credentials
kdb_hostname = <ip_or_host_of_kdb_server>"
kdb_port = "<kdb_server_port>"
Save the changes when you are done, then stop/restart Driverless AI.
Example 2: Enable kdb+ with Authentication
This example provides users credentials for accessing a kdb+ server from Driverless AI.
nvidia-docker run \
  --pid=host \
  --init \
  --rm \
  --shm-size=256m \
  -e DRIVERLESS_AI_ENABLED_FILE_SYSTEMS="file,kdb" \
  -e DRIVERLESS_AI_KDB_HOSTNAME="<ip_or_host_of_kdb_server>" \
  -e DRIVERLESS_AI_KDB_PORT="<kdb_server_port>" \
  -e DRIVERLESS_AI_KDB_USER="<username>" \
  -e DRIVERLESS_AI_KDB_PASSWORD="<password>" \
  -p 12345:12345 \
  -v /tmp/dtmp/:/tmp \
  -v /tmp/dlog/:/log \
  -v /tmp/dlicense/:/license \
  -v /tmp/ddata/:/data \
  -u $(id -u):$(id -g) \
  harbor.h2o.ai/h2oai/dai-centos7-x86_64:1.9.0-cuda10.0.23
This example shows how to configure kdb+ options in the config.toml file, and then specify that file when starting Driverless AI in Docker. Note that this example enables kdb+ with no authentication.
Configure the Driverless AI config.toml file. Set the following configuration options.
enabled_file_systems = "file, upload, kdb"
kdb_user = "<username>"
kdb_password = "<password>"
kdb_hostname = <ip_or_host_of_kdb_server>"
kdb_port = "<kdb_server_port>"
kdb_app_classpath = ""
kdb_app_jvm_args = ""
Mount the config.toml file into the Docker container.
nvidia-docker run \
  --pid=host \
  --init \
  --rm \
  --shm-size=256m \
  --add-host name.node:172.16.2.186 \
  -e DRIVERLESS_AI_CONFIG_FILE=/path/in/docker/config.toml \
  -p 12345:12345 \
  -v /local/path/to/config.toml:/path/in/docker/config.toml \
  -v /etc/passwd:/etc/passwd:ro \
  -v /etc/group:/etc/group:ro \
  -v /tmp/dtmp/:/tmp \
  -v /tmp/dlog/:/log \
  -v /tmp/dlicense/:/license \
  -v /tmp/ddata/:/data \
  -u $(id -u):$(id -g) \
  harbor.h2o.ai/h2oai/dai-centos7-x86_64:1.9.0-cuda10.0.23
This example provides users credentials for accessing a kdb+ server from Driverless AI.
Export the Driverless AI config.toml file or add it to ~/.bashrc. For example:
# DEB and RPM
export DRIVERLESS_AI_CONFIG_FILE="/etc/dai/config.toml"

# TAR SH
export DRIVERLESS_AI_CONFIG_FILE="/path/to/your/unpacked/dai/directory/config.toml"
Specify the following configuration options in the config.toml file.
# File System Support
# upload : standard upload feature
# file : local file system/server file system
# hdfs : Hadoop file system, remember to configure the HDFS config folder path and keytab below
# dtap : Blue Data Tap file system, remember to configure the DTap section below
# s3 : Amazon S3, optionally configure secret and access key below
# gcs : Google Cloud Storage, remember to configure gcs_path_to_service_account_json below
# gbq : Google Big Query, remember to configure gcs_path_to_service_account_json below
# minio : Minio Cloud Storage, remember to configure secret and access key below
# snow : Snowflake Data Warehouse, remember to configure Snowflake credentials below (account name, username, password)
# kdb : KDB+ Time Series Database, remember to configure KDB credentials below (hostname and port, optionally: username, password, classpath, and jvm_args)
# azrbs : Azure Blob Storage, remember to configure Azure credentials below (account name, account key)
# jdbc: JDBC Connector, remember to configure JDBC below. (jdbc_app_configs)
# hive: Hive Connector, remember to configure Hive below. (hive_app_configs)
# recipe_url: load custom recipe from URL
# recipe_file: load custom recipe from local file system
enabled_file_systems = "file, kdb"

# kdb+ Connector credentials
kdb_user = "<username>"
kdb_password = "<password>"
kdb_hostname = <ip_or_host_of_kdb_server>"
kdb_port = "<kdb_server_port>"
kdb_app_classpath = ""
kdb_app_jvm_args = ""
Save the changes when you are done, then stop/restart Driverless AI.
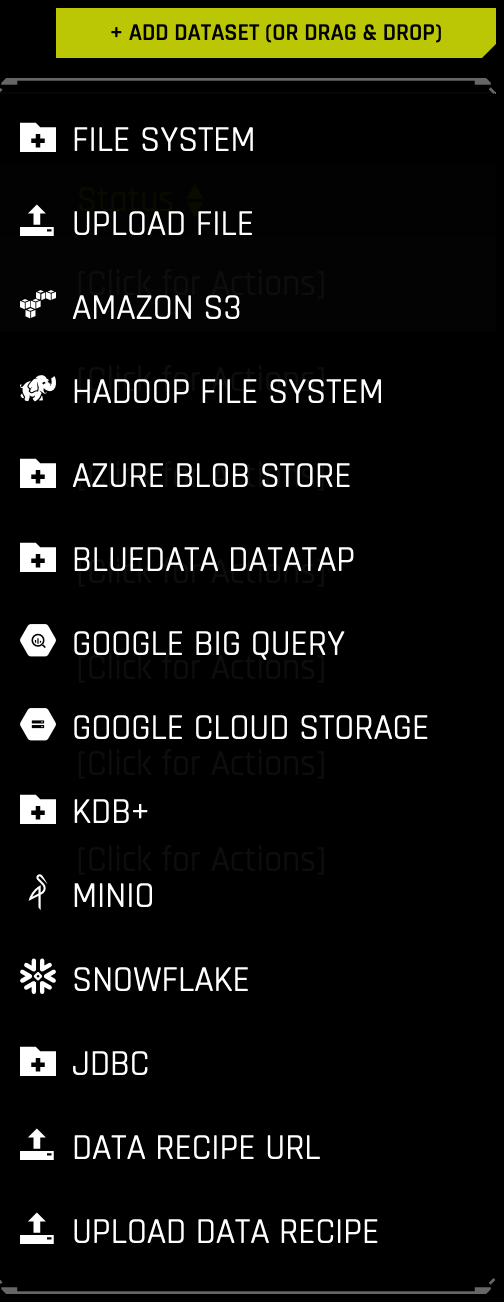
Adding Datasets Using kdb+
After the kdb+ connector is enabled, you can add datasets by selecting kdb+ from the Add Dataset (or Drag and Drop) drop-down menu.
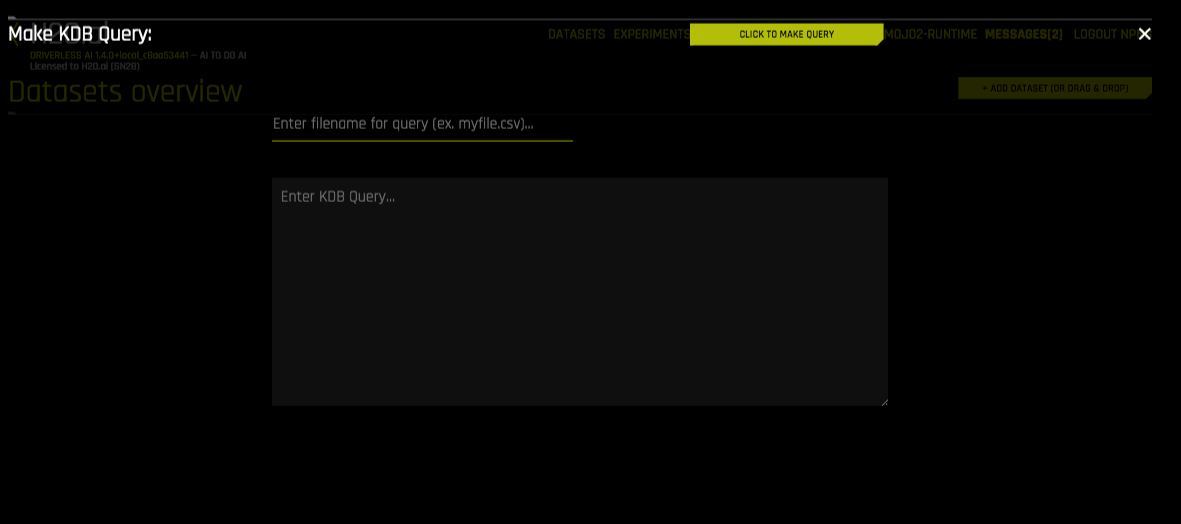
Specify the following information to add your dataset.
Enter filepath to save query. Enter the local file path for storing your dataset. For example, /home/<user>/myfile.csv. Note that this can only be a CSV file.
Enter KDB Query: Enter a kdb+ query that you want to execute. Note that the connector will accept any q qeuries. For example:
select from <mytable>or<mytable> lj <myothertable>When you are finished, select the Click to Make Query button to add the dataset.